
Short answer: do not identify a left-hand or right-hand electric trailer brake from one front photo alone. First verify the manufacturer or OE part number and the brake’s installed position on the trailer. Then cross-check the complete front view, rear backing-plate view, adjuster or self-adjuster mechanism, magnet lever and wire route. Designs vary, so shoe length or one hardware position is not a universal left/right rule.
For importers, trailer axle suppliers and distributor catalog teams, side confirmation is a fitment and returns issue. A wrong-side assembly may not operate or adjust as intended after installation. The safest sourcing process records the side together with brake size, axle rating, adjustment type and mounting pattern.
What does left-hand or right-hand mean?
Left-hand and right-hand refer to the trailer’s sides in the installed position, normally viewed while facing the trailer’s direction of travel. Confirm that convention with the axle or brake manufacturer before assigning a catalog side. If the removed sample is available, label the wheel position before shipping or photographing it.
Use this evidence in order
| Evidence | What it confirms | How to use it |
|---|---|---|
| Manufacturer or OE part number | The intended side and specification | Use as the primary reference and check the maker’s catalog or installation instructions. |
| Known wheel position | Where the removed sample was installed | Label it left or right before removal, using the trailer’s direction of travel. |
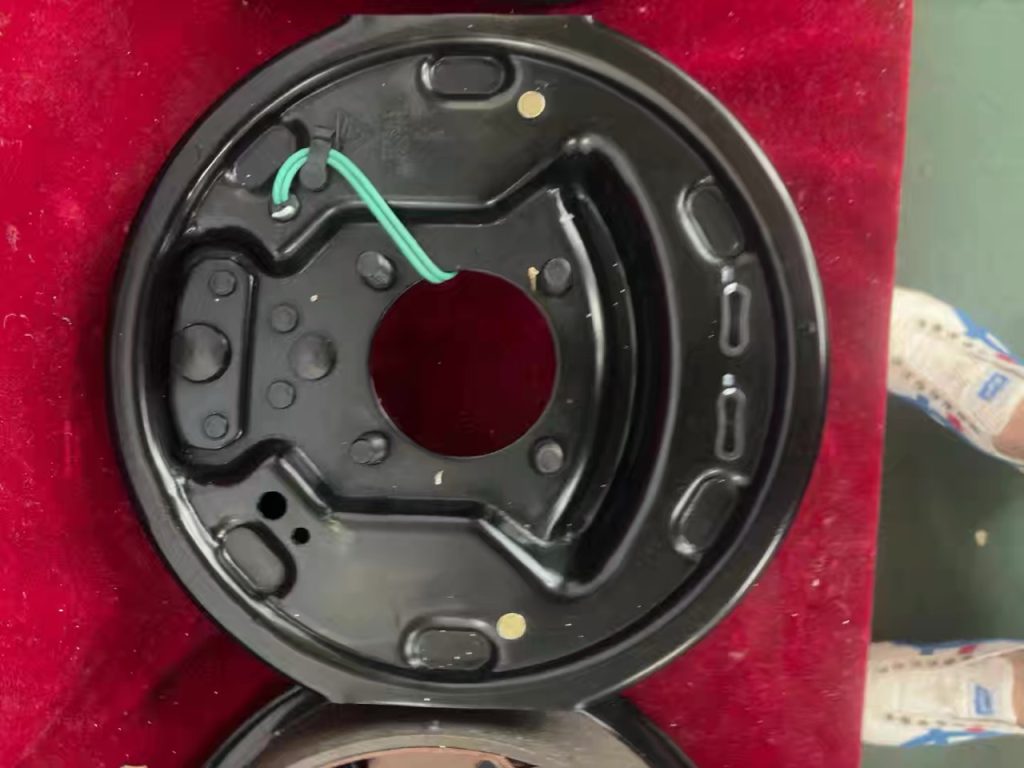
| Complete rear view | Backing plate, mounting pattern and wire exit | Compare the entire orientation with the verified reference part. |
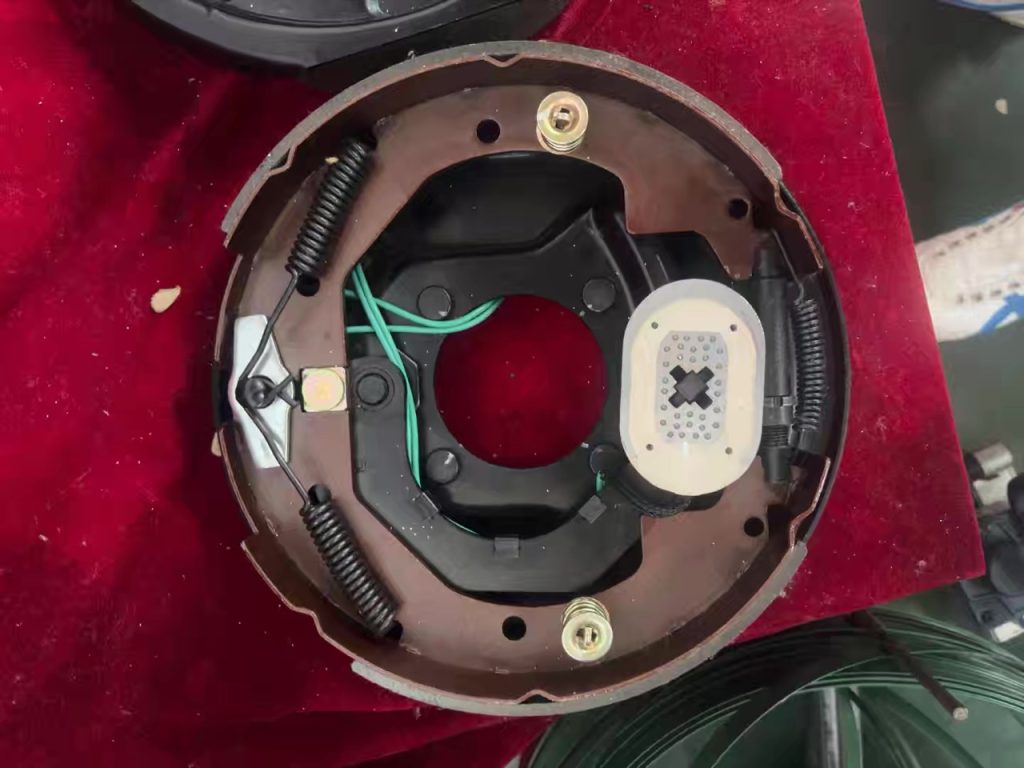
| Front hardware layout | Magnet lever, adjuster and spring arrangement | Use as a cross-check, not as a universal side rule. |
| Brake size and axle rating | Basic fitment range | These do not identify the side by themselves. |
Compare the complete front and rear views
The front view should show both shoes, the electric magnet, lever, springs and adjuster area. A cropped image can hide the parts needed for comparison.
The rear view records the full backing plate, mounting holes and magnet-wire exit. Keep the image upright and avoid mirroring it in editing software, because a mirrored photo can reverse the apparent side.
Check the adjuster and magnet mechanism
Manual-adjust and self-adjusting brake assemblies can use different hardware. Compare the adjuster, self-adjuster cable or lever, magnet actuating lever and spring layout with a known part number. Do not assume that the primary shoe, shorter lining or adjuster location always points in one direction across every manufacturer.
Confirm size, axle rating and mounting pattern
Side identification does not complete the fitment check. Record the drum diameter and shoe width, axle capacity, mounting flange bolt pattern and whether the assembly is manual-adjust or self-adjusting. Common sourcing descriptions include 10 x 2.25-inch electric trailer brakes for 3,500 lb axle programs and 12 x 2-inch brakes for 5,200, 6,000 or 7,000 lb programs, but the axle and brake manufacturer’s specification remains controlling.
Five-photo RFQ standard
- Full front view, photographed square to the brake.
- Full rear backing-plate view, not mirrored.
- Close-up of every stamped, printed or cast part number.
- Close-up of the adjuster and magnet lever area.
- Mounting flange and bolt-pattern view with measurements.
Also state the known wheel position, brake size, axle rating, adjustment type, quantity and packaging requirement. If the side is not verified, write side unknown instead of guessing.
Common identification mistakes
- Using only a cropped marketplace or catalog image.
- Treating shoe length as a universal left/right indicator.
- Sending a mirrored or rotated rear photo without noting the change.
- Assuming that two assemblies of the same diameter have the same mounting and adjustment system.
- Quoting a pair before confirming whether the requirement is one side, a left/right pair or a complete axle set.
What should a buyer send for left/right verification?
Send the part number, known installation side, five-photo set, brake dimensions, axle rating, adjustment type and mounting pattern. Meklov can compare those details with the requested electric trailer brake assembly program. Final fitment must be approved against the axle or brake manufacturer’s specification before installation.
Send a trailer brake identification RFQ
Electric trailer brake side identification FAQ
Can left and right be identified from one front photo?
No. Use a known installed position or manufacturer reference first, then cross-check complete front and rear views, adjuster mechanism, magnet lever, wire route and mounting pattern.
What does left-hand or right-hand mean?
It normally means the trailer side in the installed position when facing the direction of travel. Confirm the convention with the axle or brake manufacturer before assigning a catalog side.
What should a buyer send for side verification?
Send the known wheel position, product reference if available, complete front and rear photos, brake size, axle rating, adjustment type, mounting pattern, quantity and packaging requirement.
Technical review: Shawn Li, Product Manager, Meklov. Updated for buyer-side identification and RFQ clarity on 24 August 2026.
Need help matching a brake part?
Send product photos, model references, quantity, destination market and packaging requirements. Meklov can review the RFQ scope before quotation.